The Great Rhubarb Divide

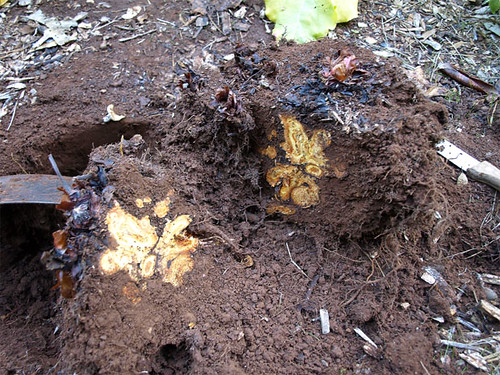
Dividing RhubarbI’m especially fond of plants that are easily propagated, either by seed or division or cuttings.  Rhubarb (Rheum x hybridum) is just such a plant, and one of my fall chores – not every fall, mind you, but every 3 to 5 years – is to dig it up and divide it once it goes dormant.

The other day, I dug up three of my plants, divided each in half, and planted half (of the halves) in the food forest in part shade, and moved the other three from their original locations to another, shadier spot in the garden proper.  Rhubarb has huge leaves, and in my garden seems to prefer plenty of protection from the afternoon sun.

When I teach garden classes, the room is usually split right down the middle as to whether rhubarb is delicious or disgusting.  I really like it.  My favorite recipe is known by the (perhaps regrettable) name rhubarb dump cake.

4 cups of rhubarb stalks, cut up like celery
1 or 2 cups of sugar or brown sugar (or the sweetener of your choice)
1 tablespoon vanilla extract
2 tablespoons tapioca
1 box of yellow cake mix
1 stick of butter

Mix up the rhubarb, sugar, vanilla and tapioca and put the whole business in one of those Pyrex baking dishes – I think they’re maybe 9 x 11″ or so – you know the ones I’m talking about.  Dump the dry cake mix on top and spread it around, then cut up the stick of butter and distribute as evenly as possible over the top, then throw the whole business in a 350 degree oven until it looks done – it will be bubbling and the top will be nicely browned.  Serve warm with a drizzle of heavy whipping cream or half-and-half or whipped cream or vanilla ice cream.  You can add other seasonal fruits to the rhubarb – strawberries and rhubarb seem to go well together, and fancy crumble top with oats and the like works as well.

Posted in Food Forest, Fruit, Vegetables | Tagged , , , , , | 6 Comments

Adventures in Biochar – Part II

Biochar!It worked!

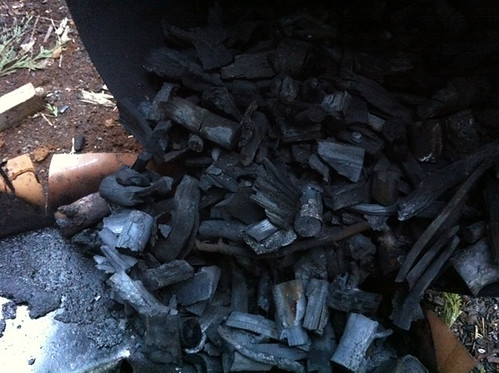
I ran into significant challenges specifically related to the design of my retort (as detailed here), but when I opened the barrel last night (in the dark, with a flashlight), I was greeted by a barrel full of charcoal.  There are a few “brands” – unburned or incompletely burned chunks – but for the most part, it worked a treat.  I will crush this batch up, soak it for a while in water and/or urine (or perhaps some alfalfa tea?), and then work it into the compost pile, later to be added to the garden.

I learned a lot, and hope to make improvements to both my retort design and the process.  This first burn was incredibly labor intensive, I think because I prepped both the fuel and the stock all at once.  I think the best way to approach the process would be to simply have the barrel ready and covered, and to fill it incrementally, firing it only once it is filled.  As for the design of the retort, I hope to find a 20-gallon barrel, as I think this size might be small enough to provide enough space for fuel and a robust fire between the inner and outer barrels.

Posted in Permaculture | Tagged , | Leave a comment

Adventures in Biochar – Part I

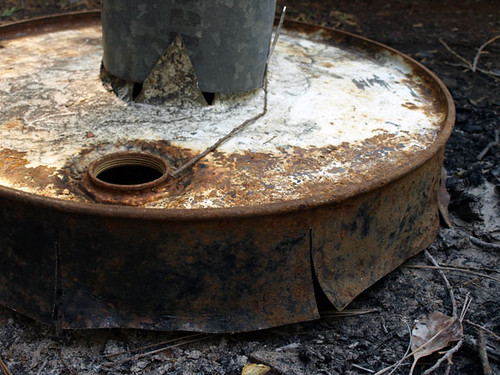
Lid of 2 barrel biochar retortSaturday last I drove into town to try to procure two 30 gallon metal barrels for my biochar retort kiln project.  I had in mind a two-barrel system similar to this one only larger, with a 30-gallon drum nestled inside a 55-gallon one.  Though he was initially reluctant, I closed the deal on 2 of the barrels, and brought them home.

A call to the El Dorado County burn hotline and it was on – a permissive burn day!  Using an inappropriate tool – in this case a now useless wood chisel, I cut twenty or so one-and-a-half inch flaps in the bottom of the outer barrel, and then cut the top from same (pictured to the right).  I then cut slits in the metal every six inches or so, in order to make it easier to cap the outer barrel.  I also cut a hole in the top of the lid for a chimney/afterburner, and attached an easily-removed five foot long piece of stove pipe.

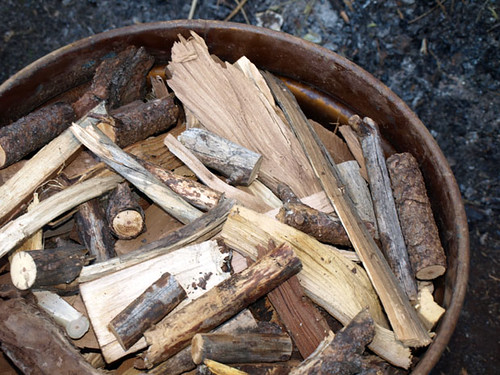
Construction complete, I set about filling the smaller barrel with biochar stock, consisting mostly of seasoned madrone and pine branches, and chips and flakes left from this year’s wood splitting – the hydraulic splitter tends to generate a fair number of these flakes, especially when splitting crooked-grained wood like madrone.

IBiochar retort filled and ready put the large outer barrel on top of the small, full barrel, then inverted the whole business.  I filled the space between the inner and outer barrels with twigs and various broken branches and wood from some old palettes, then built fire on top of the 30-gallon barrel.  Once the whole business seemed to be burning, I put the cap on the outer barrel and attached the chimney, then monitored and coaxed the fire by way of the air holes at the bottom.  Here’s where the flaws in my design were revealed.
As it turns out, I don’t think that the 30/50 dual-barrel design is going to work.  There just isn’t enough room between the inner and outer barrels for fuel sufficient to keep a hot fire going.  Drag.  The best-laid schemes o’ mice an’ men gang aft agley.

I took the lid off of the outer barrel, dumped the whole business out, and then recollected all of the charcoal stock in the smaller barrel, then lit that.  Once the fire was hot and self-sustaining, I put the outer barrel back on, flipped the whole thing back over again, and tried to once again create a fire in the space between the inner and outer barrels.  No luck.

Finally, I decided that it would be best to remove the inner barrel entirely, and so I dumped all of the wood into the larger barrel, made sure it was burning hot, and capped it.  By adjusting the air intake vents (by blocking them with dirt), and fussing with the bunghole – stop snickering – I was able to get a really hot fire going.  I added another barrel to the top as an afterburner (as in this stacked two-barrel example), and lo and behold bore witness to the vaunted wood gas effect.  Bright, intense, clean and hot blue flames shot out of the barrel and lit up the afterburner, accompanied by jet engine sounds.  Good times.

After a while, I removed the afterburner, blocked all of the air intakes, capped the hole in the top of the outer barrel and covered the top with dirt to create tight seal and prevent oxygen from entering the system.  In a short while all smoking ceased.  My hope is that when I get home this evening and open the barrel up, I’ll be greeted with some quantity of glorious biochar, rather than a big pile of ash.  I’ll let you know.

Posted in Permaculture | Tagged , | 3 Comments

Plum Gone Wild

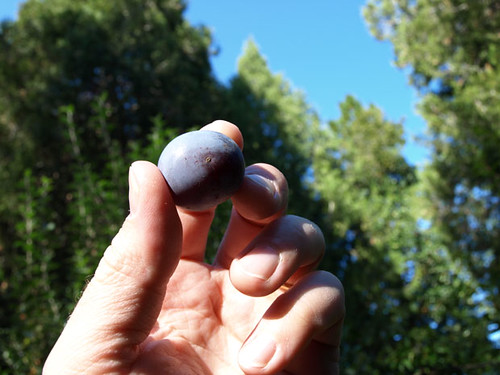
Wild-ish PlumThis fruit is from either from a wild plum tree (Prunus americana), or else from an ordinary plum tree gone feral. More likely the latter, since California doesn’t appear to be in the natural range for wild plum.

In any case, the tree from whence came this plum grows in a ditch/creek bed along a 2 lane highway, and I’ve been watching it for weeks, hoping to collect a few of the ripe, purple fruits for planting out in the food forest. Until yesterday the tree was laden with them, but this morning I noticed that nearly all of the plums had vanished.  I pulled over and collected the last few – tracks all around in the mud under the tree lead me to believe that raccoons have been feasting, and I feel lucky to have gotten any at all.

Most “domesticated” plums are grafted, but I’m fairly certain that the one from which I gathered the plums is not, given its location and the age and appearance of the trunk.  I separated the pits from the small fruits, and will plant two in a pot and two directly in the ground, and leave them to weather the elements this winter.  Hopefully by spring one or more will have germinated, and they can take their place in the food forest.

Posted in Food Forest, Fruit | Tagged , , , , | 1 Comment

“How about not doing that?” A Lesson from Fukuoka

Madrone Leaves

A pile of Pacific Madrone leaves in situ.

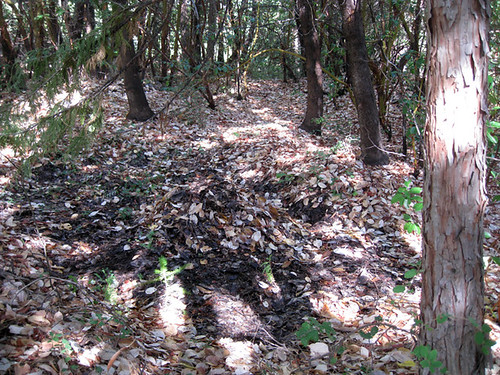
To the north of the garden proper and the food forest is a nearly pure stand of Pacific Madrone (Arbutus menzeisii)  Very little sunlight reaches the ground here, and the forest floor is piled high with generations of madrone leaves, a rich, moist and thick carpet perhaps 6 inches (or more) deep.

I formulated a plan to gather some of these fallen leaves for a leaf mold pile, and used palettes to construct a 4-sided bin next to the compost pile in the garden proper to hold decaying leaves.

I’ve lately been reading “The One-Straw Revolution” by Masanobu Fukuoka, a classic of natural farming techniques and philosophy, and a touchstone of the permaculture movement.  In this slim volume, Fukuoka details his efforts to grow fruits, vegetables and grains in harmony with nature, and outlines four principles for “do-nothing” agriculture: 1) no tilling, 2) no chemical fertilizers or prepared compost, 3) no weeding by tillage or herbicides, and 4) no dependence on chemical pesticides.

As I began raking the leaves and preparing to transport them the 200 or so yards to the leaf mold bin, I had the realization that I was setting myself up for dual effort.  That is, I would have to gather many wheelbarrowsful of leaves and wheel them some distance, only to move them again to the garden proper once they were ready to be used as a soil amendment.  Perhaps because I was tired from a long day in the garden, or perhaps because the thoughts had had time to germinate, but at that moment, I had a profound (for me anyway) realization about the meaning of “The One-Straw Revolution.” Fukuoka’s techniques, often called do-nothing, are perhaps more properly characterized as right-effort.  That is, natural farming still requires considerable doing, but the lesson revealed to me was about choosing the right things to do or to not do. To quote Fukuoka, “How about not doing that?”

Careful to take only this year’s leaves and not disturb the deeper layers, I created piles in situ, and will collect them in a year or so once they’ve decomposed.  Well played, Fukuoka-san.

Posted in Food Forest, Native Plants | Tagged , , , , | Leave a comment

Jerusalem Artichokes – Neither from Jerusalem, nor Artichokes

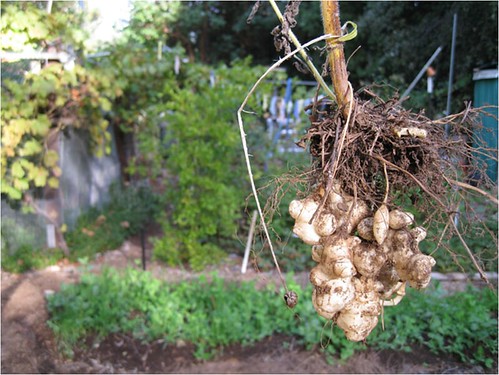
SunchokesJerusalem artichokes (Helianthus tuberosus), also called sunchokes, grow really well in my garden, and I’ve planted some in the food forest as well.

I’ve grown them for a number of years – they don’t require much care, just a sunny spot and perhaps occasional water, they’re terribly prolific, producing a whole bunch of delicious tubers with a nutty flavor and a wonderful crunchy texture, a little bit reminiscent of water chestnut.  I like them best raw straight from the ground, but they’re also good in soup.

Every year in the fall, I pull up all the plants In my original sunchoke bed (in the garden proper), harvest most of the tubers for eating, while returning a few handsful (or handfuls, if you prefer) to the bed for next year, and then throw the stalks in the compost pile.  Every year the plants return, in some years producing more tubers than in others, but always more than I can eat.  According to everything I’ve read, they can be an invasive nuisance in some parts of the world, but they’re quite well behaved in my conditions, I think because of the relatively hot, dry summers.

Plants for a Future has good information about sunchokes, and has lots of other interesting information about woodland garden species, albeit information about species that do well in England (home to some of the most celebrated food forests).

Posted in Food Forest, Native Plants, Vegetables | Tagged , , , , | 1 Comment

Hügelkultur Fruit Tree Mound

hugelkultur

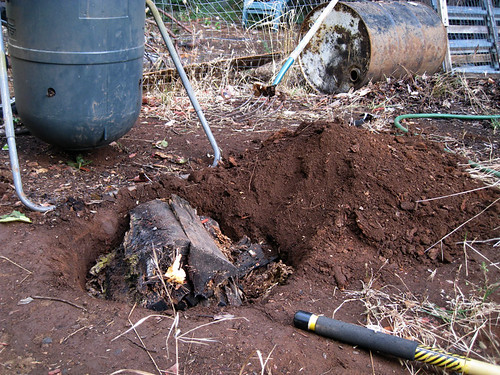
Burying a rotten log to create a proper hugelkultur mound.

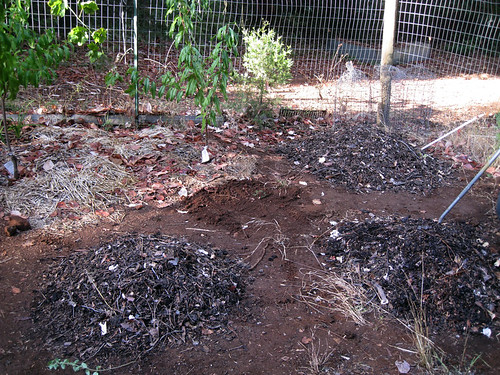
In a previous post, I described preparing a future planting site by burying horse food.  This weekend, I created an actual, official hügelkultur mound, using a big old rotten log, as well as two other mounds, one filled with forest floor duff, and one with alternating layers of unfinished compost and forest floor duff.

The duff didn’t actually come from the forest floor, but from the garage/studio/guesthouse roof, where it had been accumulating (thanks to overhanging cedar, pine and madrone trees) for perhaps 3 or 4 years.  It makes wonderful mulch, so I figured I’d bury it and see what happens.  If I had to guess, I’d say burying the materials (duff and wood) will probably lower the soil pH, creating localized slightly acidic conditions.  Fortunately, most plants prefer slightly acid soil, so I’m not overly concerned.

hugelkulture_1

Mound #1 (left): Compost + duff. Mound #2 (right foreground): Hugelkultur proper. Mound #3 (right background): Duff

Incorporating a lot of wood and woody materials into the soil creates (at least initially) a nitrogen deficit, as all the local bacteria burn up any available nitrogen as they endeavor to break down the wood.  Keeping this in mind, I planted each hill with a leguminous soil builder mix – beans, peas, vetch, oats and rye – just as I did with the horse food mound.  I’m hoping that the cover crop, combined with the effects of time – I’m not planning on planting into any of these mounds for about six months – will mitigate any nitrogen deficit, leaving me with some nice, rich, well draining soil.

I plan to plant these mounds with fruit trees in the spring.  This particular part of the garden is host to recently planted dwarf peach and nectarine trees (they’re in the background of the picture above), and I’d like to add perhaps one more nectarine, a jujube, and maybe a sea-buckthorn to the mix.

Posted in Food Forest, Fruit | Tagged , , , , | 2 Comments

Hügelkultur for the Older Horse

horse_01I’ve been reading up on hügelkultur, which is the process of creating raised beds over decaying wood.  As the wood breaks down, it provides warmth, and increases the water holding capacity of the soil.  There’s no shortage of decaying wood around the property, so I’m planning to build a few hügelkultur beds this fall.

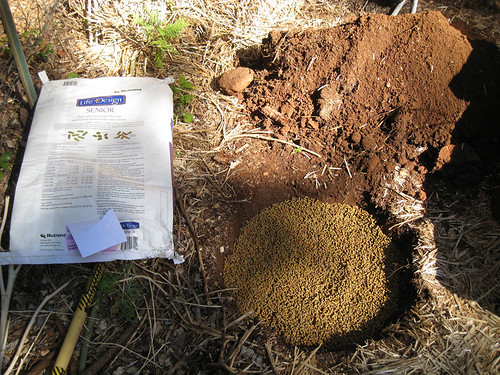
A while back, I found a big bag of horse food on the side of the road – judging by the condition of the bag, it had flown out of the back of a pickup truck some time ago.  I picked it up, thinking I might compost it, and then decided that instead I would dig a hole and bury the pellets, then plant a fruit (or perhaps a nut) tree over the top of it in the spring.  Not hügelkultur exactly, but more like trench or post hole composting.

horse_02In any case, on Saturday I dug a big hole at the north edge of the garden proper, poured the horse food in the hole, then mounded dirt on top of it.  Finally, I seeded the little mound with cover crop seeds, a general mix containing bell beans, field peas, vetch and oats.  It’s my hope that the cover crop will help to stabilize the mounded soil so that it doesn’t all wash away over the winter.

Hopefully the old horse food (the old horse food?) will all be broken down by bare root season, and will provide a nutritious bed for another fig or feijoa.

Posted in Fruit | Tagged , , , , , , | 2 Comments

DIY Multi-dibble

This image of a dibble was released into the public domain by Pearson Scott Foresman. Original image can be found at commons.wikimedia.org

I’m fascinated by the range of tools created by humans to make certain jobs easier.  This beautiful gallery of Antique Farm Tools from England, Scotland and Wales includes such specialty implements as turnip hooks, beet knives, and various dibbers (also called dibbles), which are wood or metal implements for digging holes into which seeds, seedlings and bulbs are planted.

The aforementioned site has pictures of common handheld wooden dibbers, as well as long-handled metal ones, and crop-specific specialty dibbles, including one specifically designed for potatoes.

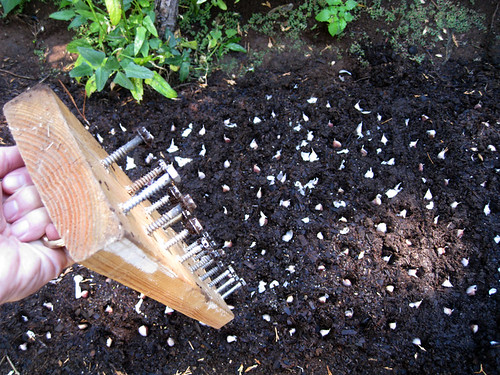
I typically just use a stick, but I’ve been designing an adjustable multi-dibble in my head for years.  Over the weekend, I finally got around to building a prototype, using a leftover chunk of 2×6 lumber, a couple of old cabinet handles, and a handful of hex head bolts.  I designed it to create holes using a plan of diamonds, to maximize the number of plants per foot of row.

Multiple Dibble MatrixOnce I finished drilling the pilot holes and screwing the bolts into place, I used my new multi-dibble to plant garlic (one of my favorite crops and year after year one of the most successful in my garden).  Specifically, I planted out 28 bulbs of hardneck garlic (a porcelain and a purple stripe – I don’t remember the varieties, as I’ve been planting them for years), the biggest and best saved from last year’s crop.  Each bulb contained approximately 6.5 cloves, so I should end up with 182 bulbs of garlic next year, somewhere around the 4th of July or slightly earlier.

Though there’s room for improvement, I’m pleased with the multi-dibble.  One day I hope to create a more elaborate version, with adjustable dibbles to allow for different hole spacing.

Posted in Vegetables | Tagged , , , | 1 Comment

Gardening With Safety Goggles

Sulfuric AcidI’ve been gardening for a number of years, but I can’t recall another time when I had to wear nitrile gloves to sow seeds.

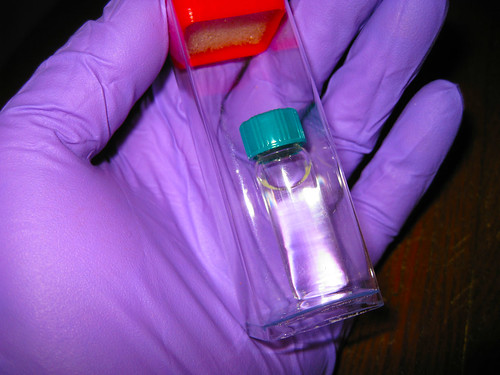
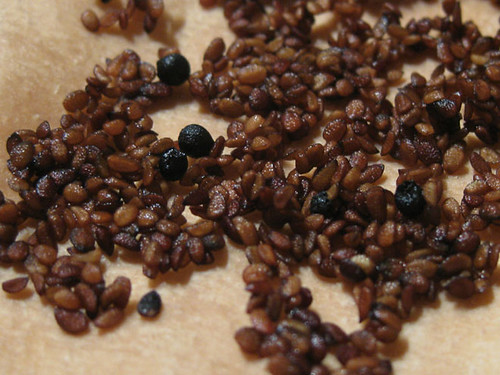
As mentioned in the prior post, I am interested in germinating a whole bunch of elderberry seeds for inclusion in the food forest.  Today I procured a little vial of wickedly strong sulfuric acid, which I used to scarify the elder seeds I collected over the weekend.  The little glass vial of acid was housed inside a secondary containment vessel, which my chemist friend assured me was required by the Department of Transportation in order for the chemical to be safely transported.

In addition to the acid, my chemist friend shared a whole bunch of wisdom about materials handling, safety protocols, and the like.  I confess I was a little nervous heading into the scarification process – sulfuric acid at this concentration (18 M!) is apparently no joke.  As it turns out, the process was pretty easy, and nary an injury was suffered.

The procedure was fairly straightforward.  I placed perhaps a teaspoon of seeds in a glass…um…glass, added the acid, and set a timer for 10 minutes.  When time was up, I added baking soda – a lot of baking soda – to neutralize the acid, then washed the seeds.

Elder Seeds on AcidMy plan is to set up a little experiment:
Group 1 – untreated seeds planted directly in the garden now, Group 2 –  untreated seeds cold stratified in the refrigerator for 60 days, then planted in the garden, Group 3 – acid scarified seeds planted directly in the garden now, and Group 4 – acid scarified seeds cold stratified in the refrigerator for 60 days and then planted in the garden. According to the research, Group 4 should have the highest germination percentage, so we’ll see.

Given that I had only a very limited supply of sulfuric acid, I decided to throw some allium seeds in the mix, about four seeds each of Bear’s Garlic (Allium ursinum) and Ramps (Allium tricoccum), the latter being notoriously difficult to germinate.  Though I’ve never read anything about using acid to scarify ramps seeds, the citizen scientist in me figured it was worth a shot.  I would love it if either of these alliums would naturalize in the food forest, but I’m not holding my breath – I haven’t yet found a variety that wants to really take hold and come back year after year in my particular conditions.  The closest I’ve got is a small patch of garlic chives (Allium tuberosum) that finally flowered this year after 5+ years in the ground in the garden proper.  I’m thinking of dividing them later in the fall and moving half out to a partly shady area in the forest.  In other allium news, my onions should arrive in the mail any day now…

Posted in Food Forest, Fruit, Native Plants | Tagged , , , , | 2 Comments